
Silicone render has become increasingly popular for both domestic and commercial properties due to its durability and weather resistance. However, like any exterior surface, it requires proper maintenance to keep it looking its best. We'll show you exactly how to clean silicone render safely and effectively.
Understanding what makes silicone render different from other exterior finishes is crucial for proper maintenance. This advanced coating system offers excellent protection against the elements, but it needs specific care to maintain its appearance and performance over time.
Silicone render is hydrophobic, meaning it naturally repels water. For those unfamiliar, what is silicone rendering, it's a modern render system designed to resist moisture while allowing walls to breathe, making it ideal for UK climates. This unique property means normal rainfall can remove a surprising amount of loose dust and soot from the surface. However, biological growth, algae and mildew need an active cleaner to break them down effectively.
The self-cleaning properties of silicone render work well for general dirt, but organic growth requires targeted treatment. On typical UK homes, about 60 to 80 percent of visible discolouration on silicone render comes from biofilm on shaded or north-facing walls, rather than from general dirt accumulation.
Different areas of your property will show varying levels of soiling. South-facing walls typically stay cleaner due to UV exposure and better drying conditions, while north-facing and shaded areas are more prone to organic growth and staining.

Regular maintenance is key to keeping your render looking fresh. A light maintenance wash every 6 to 12 months keeps the finish brighter for longer. However, in coastal, wooded, or heavily shaded areas, plan for cleaning every 3 to 6 months.
Watch for early signs that indicate cleaning is needed. Green or black staining, particularly around downpipes or in sheltered areas, suggests biological growth that won't wash away naturally. Stubborn stains or persistent discolouration are clear indicators that targeted cleaning is required.
The timing of your cleaning matters too. Avoid cleaning during extreme weather conditions or when temperatures are outside the ideal range of 5 to 25°C. Hot surfaces can cause cleaning solutions to flash dry, leaving streaks, while freezing conditions reduce cleaner effectiveness.
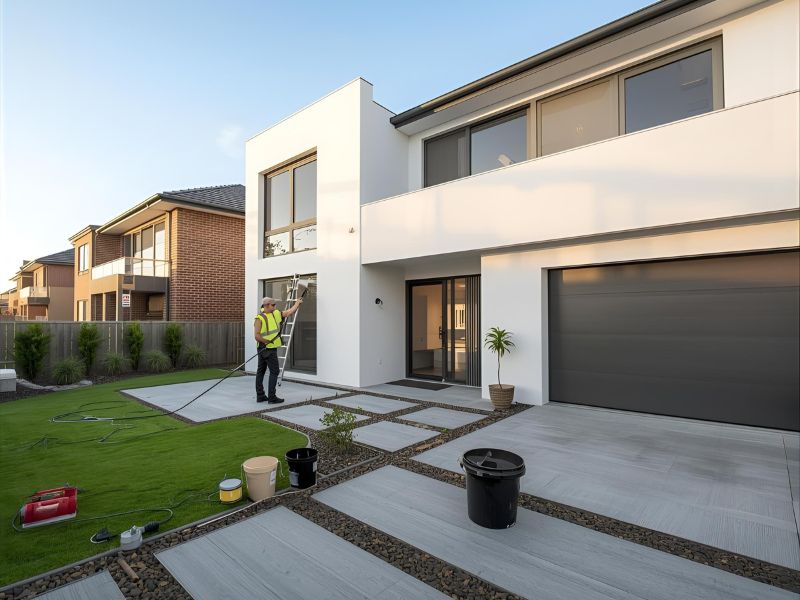
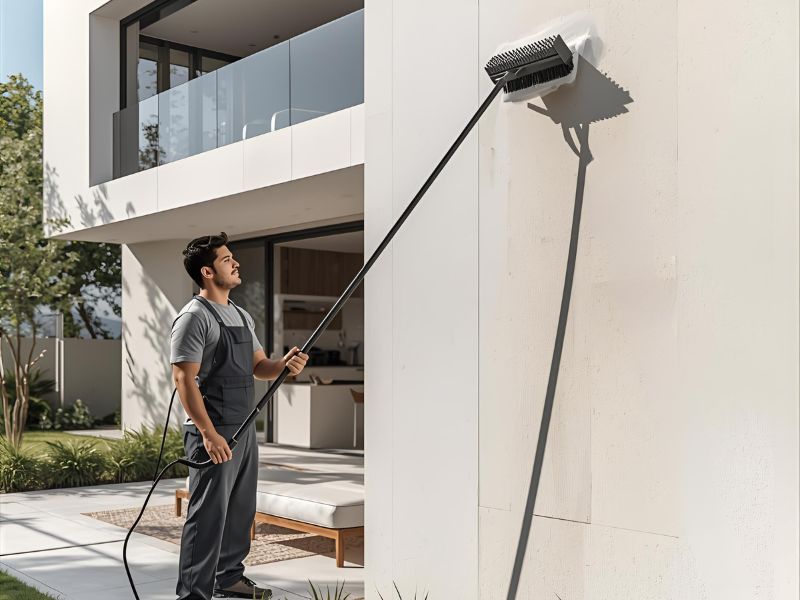
Before starting any cleaning project, gather the right equipment. You'll need a pressure washer capable of low pressure operation, ideally under 60 bar (about 900 psi). A soft bristled brush on a telescopic pole will help with stubborn areas without damaging the surface.
For cleaning solutions, choose pH neutral or mildly alkaline facade cleaners with a pH range of 6 to 9. These protect the colour and resin binders in your silicone render. Avoid strong acids or heavy bleach mixes that can chalk the finish and damage the surface permanently.
For algae growth and mould removal, a commercial mould remover or quaternary ammonium based biocide works best. These are typically used at a 1:10 to 1:20 dilution ratio and require proper dwell time for effective results.
Professional equipment makes the job easier and safer. Water use is modest with a low pressure sprayer, roughly 8 to 12 litres per minute. A 100 square metre facade can be cleaned with around 200 to 400 litres depending on soiling levels and cleaning techniques.
Protect surrounding areas before starting the cleaning process. Cover nearby plants with plastic sheets and give them a thorough freshwater pre-soak. This helps prevent damage from cleaning chemicals and ensures any residue is quickly diluted.
Wear appropriate protective gear including eye protection, waterproof gloves, and non-slip footwear. Many cleaning solutions can cause skin irritation, so proper protection is essential throughout the process.
Mask bare metals and natural stone surfaces to avoid etching or discolouration. Some cleaning chemicals can react with these materials, causing permanent damage that's expensive to repair. Take time to properly protect these surfaces before beginning work.
Consider collecting runoff where possible to prevent contamination of drains or water courses. This is particularly important when using biocides or strong cleaning solutions that could harm the environment.
Walk around your property to assess the extent of cleaning needed. Different areas will require different approaches. Heavy organic growth may need multiple treatments, while general soiling might only need a single wash.
Check for any damage to the render surface that needs addressing before cleaning. Cracks or loose areas should be repaired first to prevent water ingress during the cleaning process. Small repairs are much easier to handle before they become major problems.
Coverage planning helps you prepare adequately. Textured silicone render typically absorbs 4 to 8 square metres of liquid per litre per coat. Plan for more product when dealing with 2 to 3mm grain finishes compared to 1mm grain surfaces.
Document the current condition with photos. This helps you track progress and identify areas that might need additional attention or different cleaning methods.
Start by removing loose debris from the surface using a soft brush or low pressure water rinse. This prevents loose material from being ground into the surface during the main cleaning process. Work systematically from one area to another to ensure complete coverage.
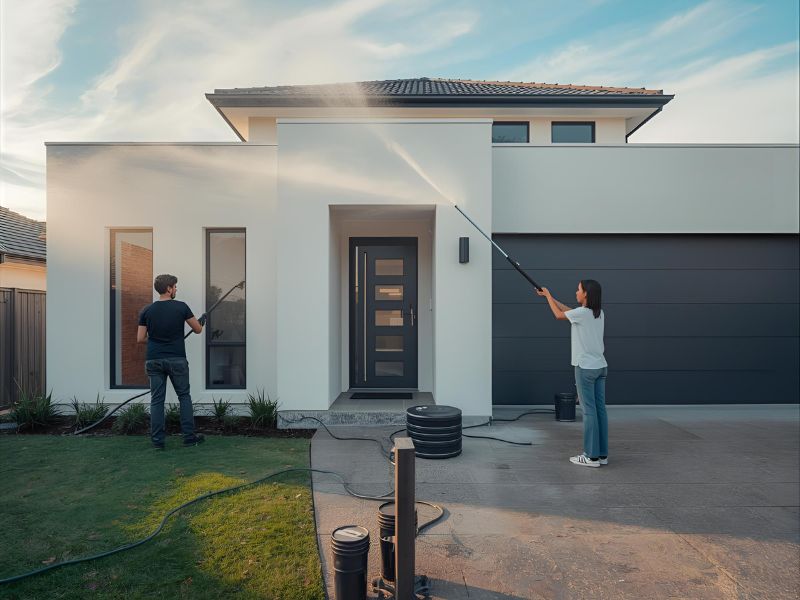
Apply your cleaning solution using the bottom-up method to control runs and spotting. This technique helps prevent streaking and ensures even coverage of the cleaning product. Allow the cleaning solution proper dwell time, typically 15 to 30 minutes for biological growth.
For algae and mildew, quaternary ammonium based biocides need time to work effectively. Heavy growth may need a second application after 24 to 48 hours for complete removal. Don't rush this process as insufficient dwell time leads to poor results.
Use your soft brush to gently scrub stubborn areas. Work in circular motions and avoid excessive pressure that could damage the textured surface. The brush helps break down biological growth and works the cleaning solution into textured areas.
Rinse the surface thoroughly using the top-down method for an even finish. This simple order can cut visible streaking by half. Keep the pressure washer lance at least 30 to 50cm from the wall and avoid using turbo nozzles that can damage the textured grain and pigment.
Some areas may require targeted cleaning methods. Heavily stained sections around guttering or downpipes often need extra attention and possibly stronger cleaning solutions. Work on these areas separately to avoid over-treating the entire surface.
Biological growth in damp or shaded areas can be particularly persistent. These areas may benefit from additional applications of biocide treatment. Allow proper drying time between applications for maximum effectiveness.
If standard cleaning methods aren't sufficient, consider professional help rather than using increasingly aggressive chemicals. Some stains may indicate underlying issues with the building fabric that need professional assessment.
After cleaning, allow 12 to 24 hours of dry weather before applying any follow-up treatments. This drying time is crucial for the surface to properly cure and prepare for additional products.
A follow-up biocide treatment can help keep regrowth at bay for 12 to 24 months depending on exposure conditions. Apply this treatment only after the surface has fully dried from the initial cleaning process.
Never apply sealers that block vapour permeability. Silicone render is designed to breathe, and non-breathable sealers can trap moisture, encouraging future staining and potentially causing structural issues.
Simple prevention measures can significantly reduce future cleaning requirements. Trimming vegetation back 300 to 500mm from walls reduces moisture retention and limits organic growth opportunities.
Improving guttering and downpipe performance can reduce green staining by 30 to 50 percent. Regular gutter maintenance prevents overflow and the associated staining that occurs when dirty water runs down the wall surface.
A standard two-storey, 100 square metre elevation typically takes 3 to 5 hours for a professional clean including setup time. Delicate detailing or heavy organic growth can double this time, so plan accordingly.
Regular maintenance prevents the need for aggressive cleaning methods that could damage the render surface. Frequent cleaning prevents the build-up of stubborn stains that require stronger chemicals and more intensive treatment.
Consider your comfort level with working at height and handling cleaning chemicals. Professional services have the proper equipment, experience, and insurance to handle challenging cleaning situations safely.
For large commercial properties or buildings with complex architectural details, professional cleaning is often the most cost-effective option. Professionals can complete the work more quickly and with better results than DIY approaches.
However, regular maintenance cleaning of domestic properties can often be handled by property owners with the right equipment and knowledge. Start with less visible areas to practice your technique before tackling prominent facades.
Weather conditions significantly impact cleaning effectiveness. Avoid direct sun and hot facades which can flash dry chemicals and leave streaks. Early morning or late afternoon often provide the best conditions for render cleaning.
Plan cleaning projects during stable weather periods when you can guarantee at least 24 hours of dry conditions after completion. This ensures proper curing and prevents immediate re-contamination from rain.
Seasonal timing matters too. Spring and autumn often provide ideal conditions with moderate temperatures and lower UV levels that won't interfere with chemical effectiveness.
Using excessive pressure is one of the most common mistakes. High pressure can damage the surface texture and drive contaminants deeper into the material. Always start with the lowest effective pressure and increase gradually if needed.
Avoid using harsh chemicals or household cleaners not specifically designed for render surfaces. These can cause permanent discolouration or damage to the protective properties of the silicone render system.
Don't skip the preparation phase. Proper protection of surrounding areas and adequate planning prevents costly damage to landscaping, windows, or other building elements.
Never attempt to clean render surfaces in extreme temperatures or adverse weather conditions. This leads to poor results and can be dangerous for the person doing the work.
If repainting is ever required after a deep clean for colour refresh, only use vapour permeable, silicone compatible coatings. Standard masonry paints can reduce breathability by up to half and accelerate surface issues.
Homeowners often ask how long does silicone rendering last — with proper maintenance, it can easily perform for 25 to 30 years, making upkeep well worth the effort. Keep records of cleaning dates and methods used. This information helps you track what works best for your specific property and environmental conditions.
Consider the long-term cost benefits of regular maintenance versus major restoration work. Consistent care extends the life of your silicone render system and maintains your property's appearance and value.
Monitor the effectiveness of your cleaning routine and adjust frequency based on results. Properties in different locations or with varying exposure conditions may need customised maintenance schedules.
For complex cleaning challenges or valuable properties, professional assessment can prevent costly mistakes. Rendering specialists understand the specific requirements of different silicone render systems and can recommend appropriate treatments.
Professional services often have access to specialised equipment and cleaning products not available to consumers. This can be particularly valuable for large surfaces or challenging staining issues.
Regular professional inspection can identify potential problems before they become serious issues requiring expensive repairs or complete re-rendering.
Getting a free quote from Rendering Newcastle ensures you receive expert advice tailored to your specific property and cleaning requirements. Our experienced team understands the unique challenges of maintaining silicone render in the UK climate and can recommend the most effective cleaning approach for your situation.
Proper cleaning and maintenance of silicone render protects your investment and keeps your property looking its best. Regular attention prevents small issues from becoming major problems and extends the life of your render system significantly.
The key to successful render maintenance lies in understanding the material properties, using appropriate cleaning methods, and maintaining a regular care schedule. With proper technique and the right products, you can keep your silicone render looking fresh and performing well for years to come.
Remember that each property is unique, and what works for one situation may not be ideal for another. Take time to understand your specific conditions and adjust your approach accordingly for the best results.